The Hammerfish
This is a part of some early testing I’ve been doing for creature animations, meant for a small game that’s been knocking around in my head. The idea requires having several animals roaming about the environment. I’m just one person so one way to accomplish that would be to do all the modeling inside Houdini, rely on CHOPs-driven animation, and a bit of simulation sprinkled throughout to quickly give life to each of the creatures. After modeling and animating, I export them using the VAT output SideFX ships, allowing for much more fauna than what would be possible with bone-based animations. In my mind, the advantage of this approach is the ability to animate while modeling, then tweak and add details while retaining those already created animations. This serves as a brief walkthrough of the setup for this Hammerhead-Jellyfish, the “Hammerfish”. At the bottom of the page, you’ll find an image of the full network.
Body
I started with a sphere, grouped both ends and used soft transforms to get the desired bell shape. Then smoothed the result.
"Hammers"
I find it easiest to start with curves when there's a specific silhouette I'm looking for. This is extruded and then subdivided. The top and bottom faces are grouped and transformed to give a rounder appearance after its been converted to a VDB, back to polygons, and smoothed. The result is mirrored to give that hammerhead-like shape. Little details are added to it afterward.
Combine Body and "Hammers"
The pieces are merged by converting to VDB, then back to polys. I get a useable topology using Quadremesher, before splitting the mesh into one "quadrant". All my references were squids with these beautiful patterns. Some of them had a nice symmetry to them, and in pursuit of that look, I felt it best to have mirrored UVs. This made it easier to texture in Substance Painter and gave me a higher resolution for details.
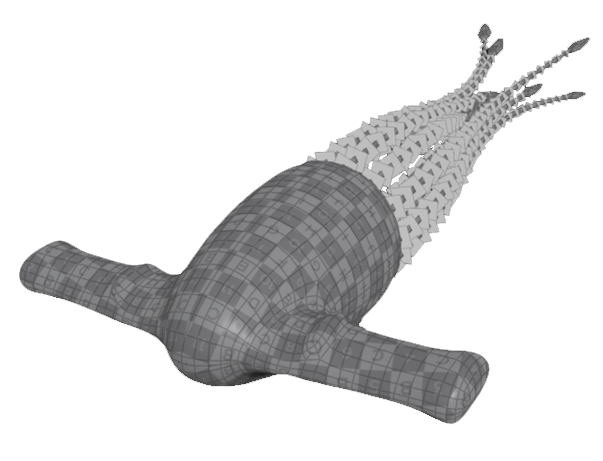
Vellum Tentacles
All of the animations (including the main body) are done using transforms with parameters driven by a CHOPs node so it's easily visualized, tweaked, and in sync. For the tentacle animation, I copied lines to a disc, ran that through a vellum hair sim, and swept the resulting curves. Details were added by copying planes and tentacle "feet" to points I grouped after the vellum sim. The sweep node generated UVs for the curves, and the other pieces were done separately. All of the UVs were then quickly rearranged manually for easier texturing.
Final Assembly
Both pieces were then moved into position using transforms.
Texturing
I exported the mesh to Substance Painter for texturing. The body was the main piece I had to work on since I knew I wanted the tentacles to be emissive, with little detail coming from the Diffuse map. I gave them a gradient using vertex colors to serve as the emissive mask and created some controls in the Unreal material to offset the gradient and control contrast. In this project, I used "quick material" nodes to create texture sets that were easily merged together using TextureMerger from PlayCreative. Created two normal maps in Designer, one for splotchy macro noise and a detail map to give a skin-like appearance.
This was an extremely fun project, and I'm excited to continue working with VATs. I was really inspired by all the Houdini mograph artists out there. If you read this far I sincerely appreciate it, as this is my first write-up here. If you have any questions or comments don't hesitate to reach out. My contact information is linked on the left and at the bottom. Til next time!
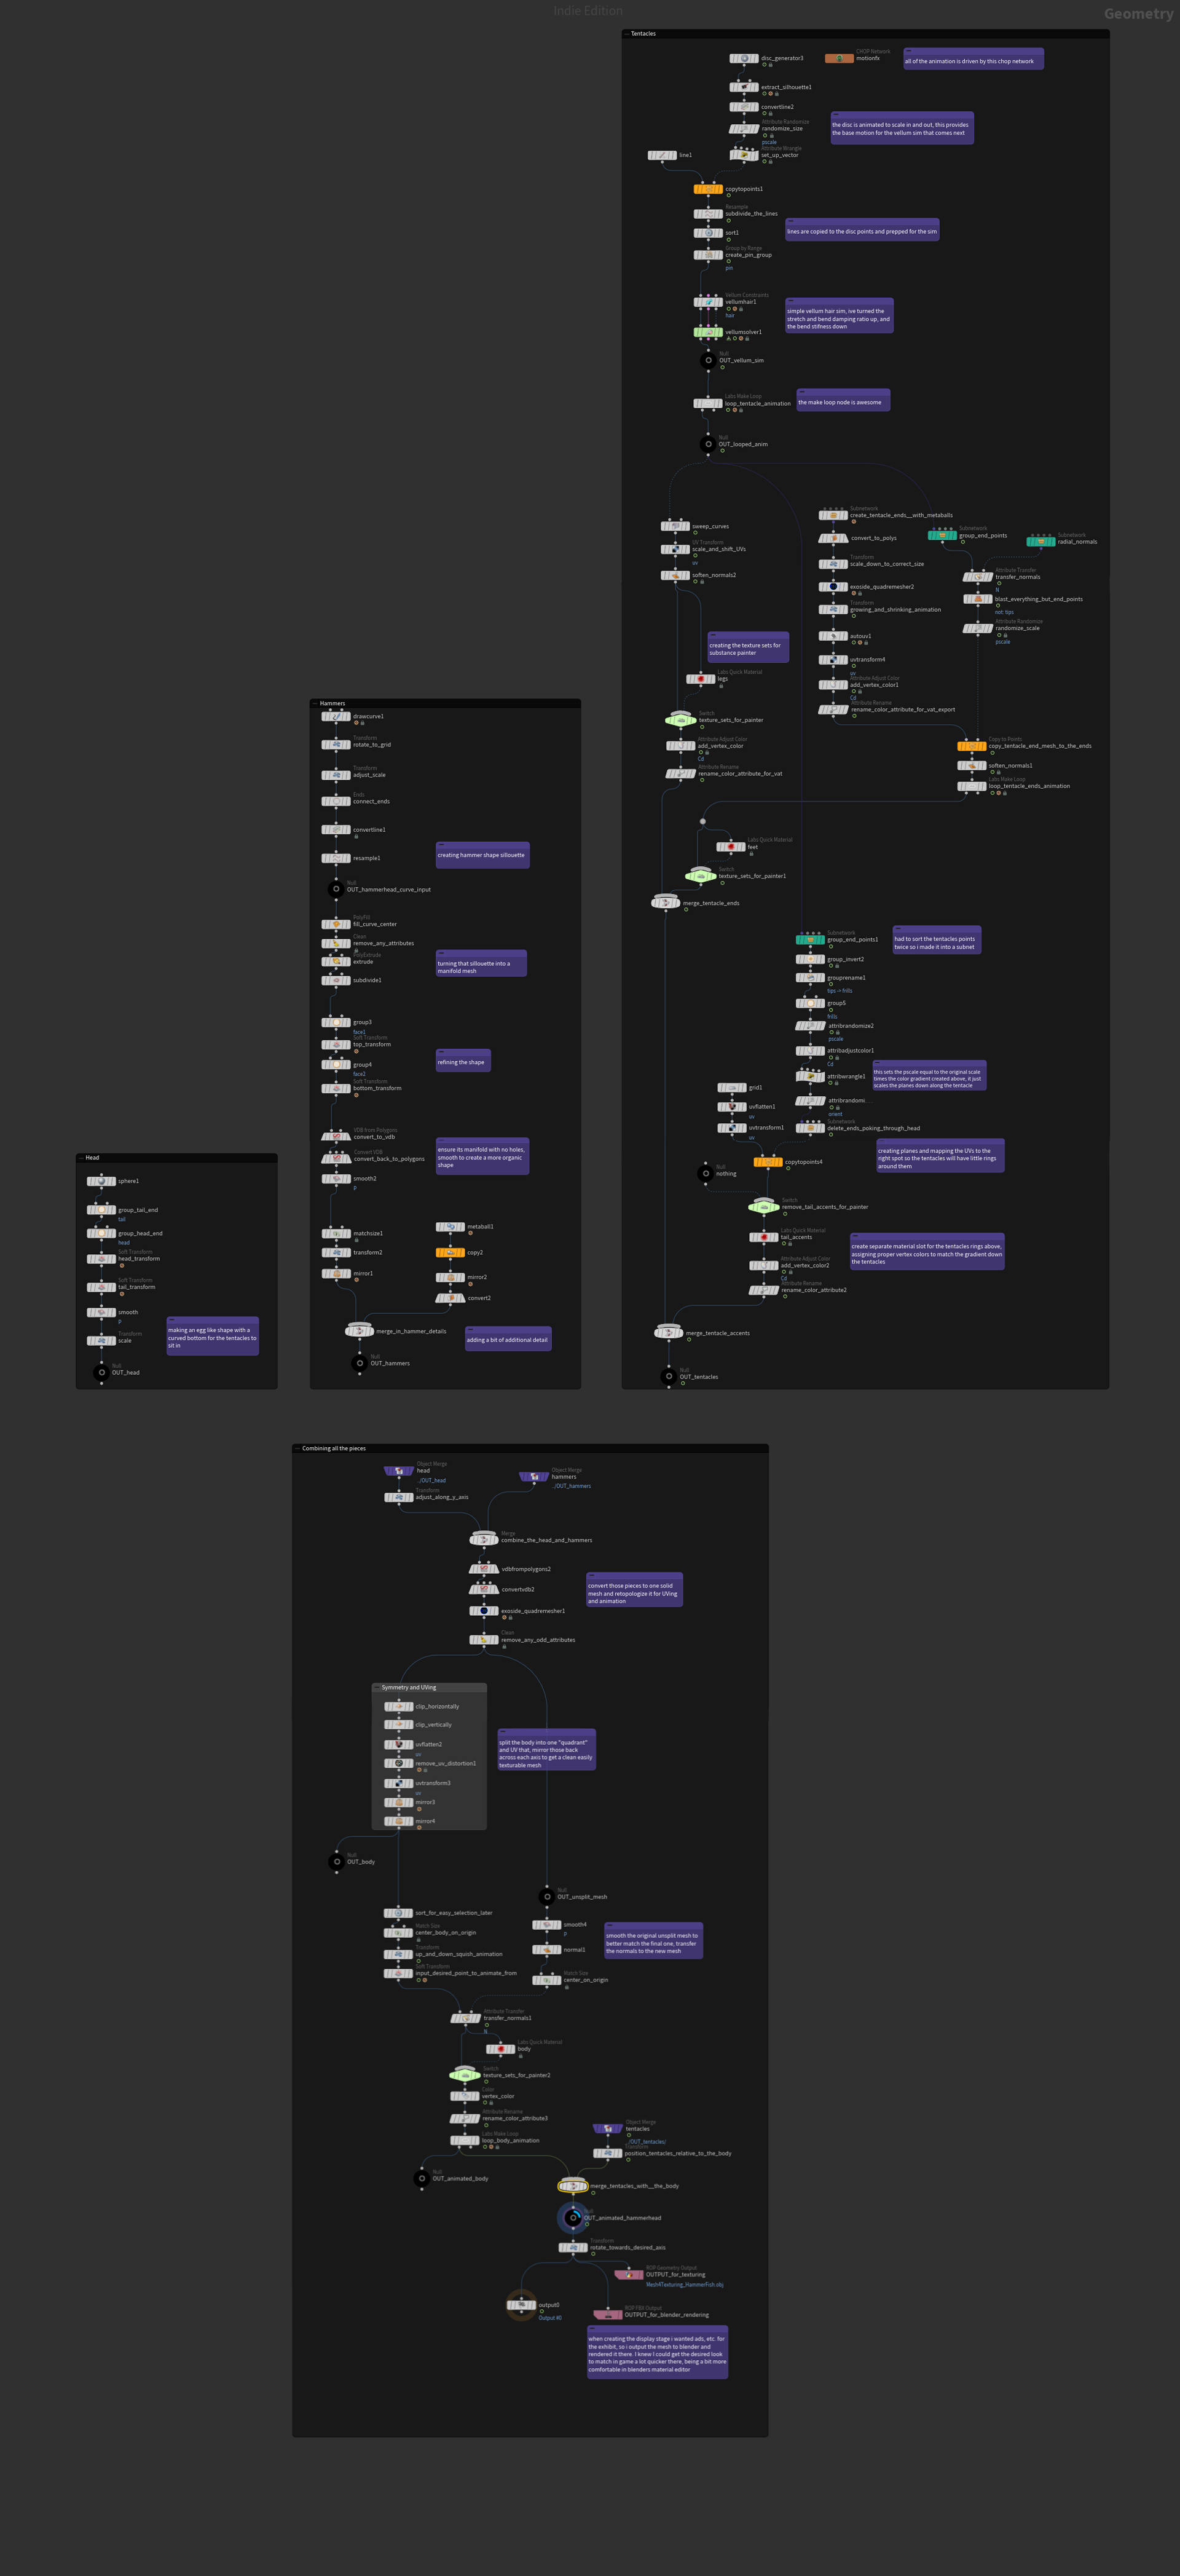
Full Network